Overview
Each portal has a set of features that can be independently enabled or disabled. This allows you to start with a minimal portal and add capabilities over time, or to create focused portals that serve a specific purpose.
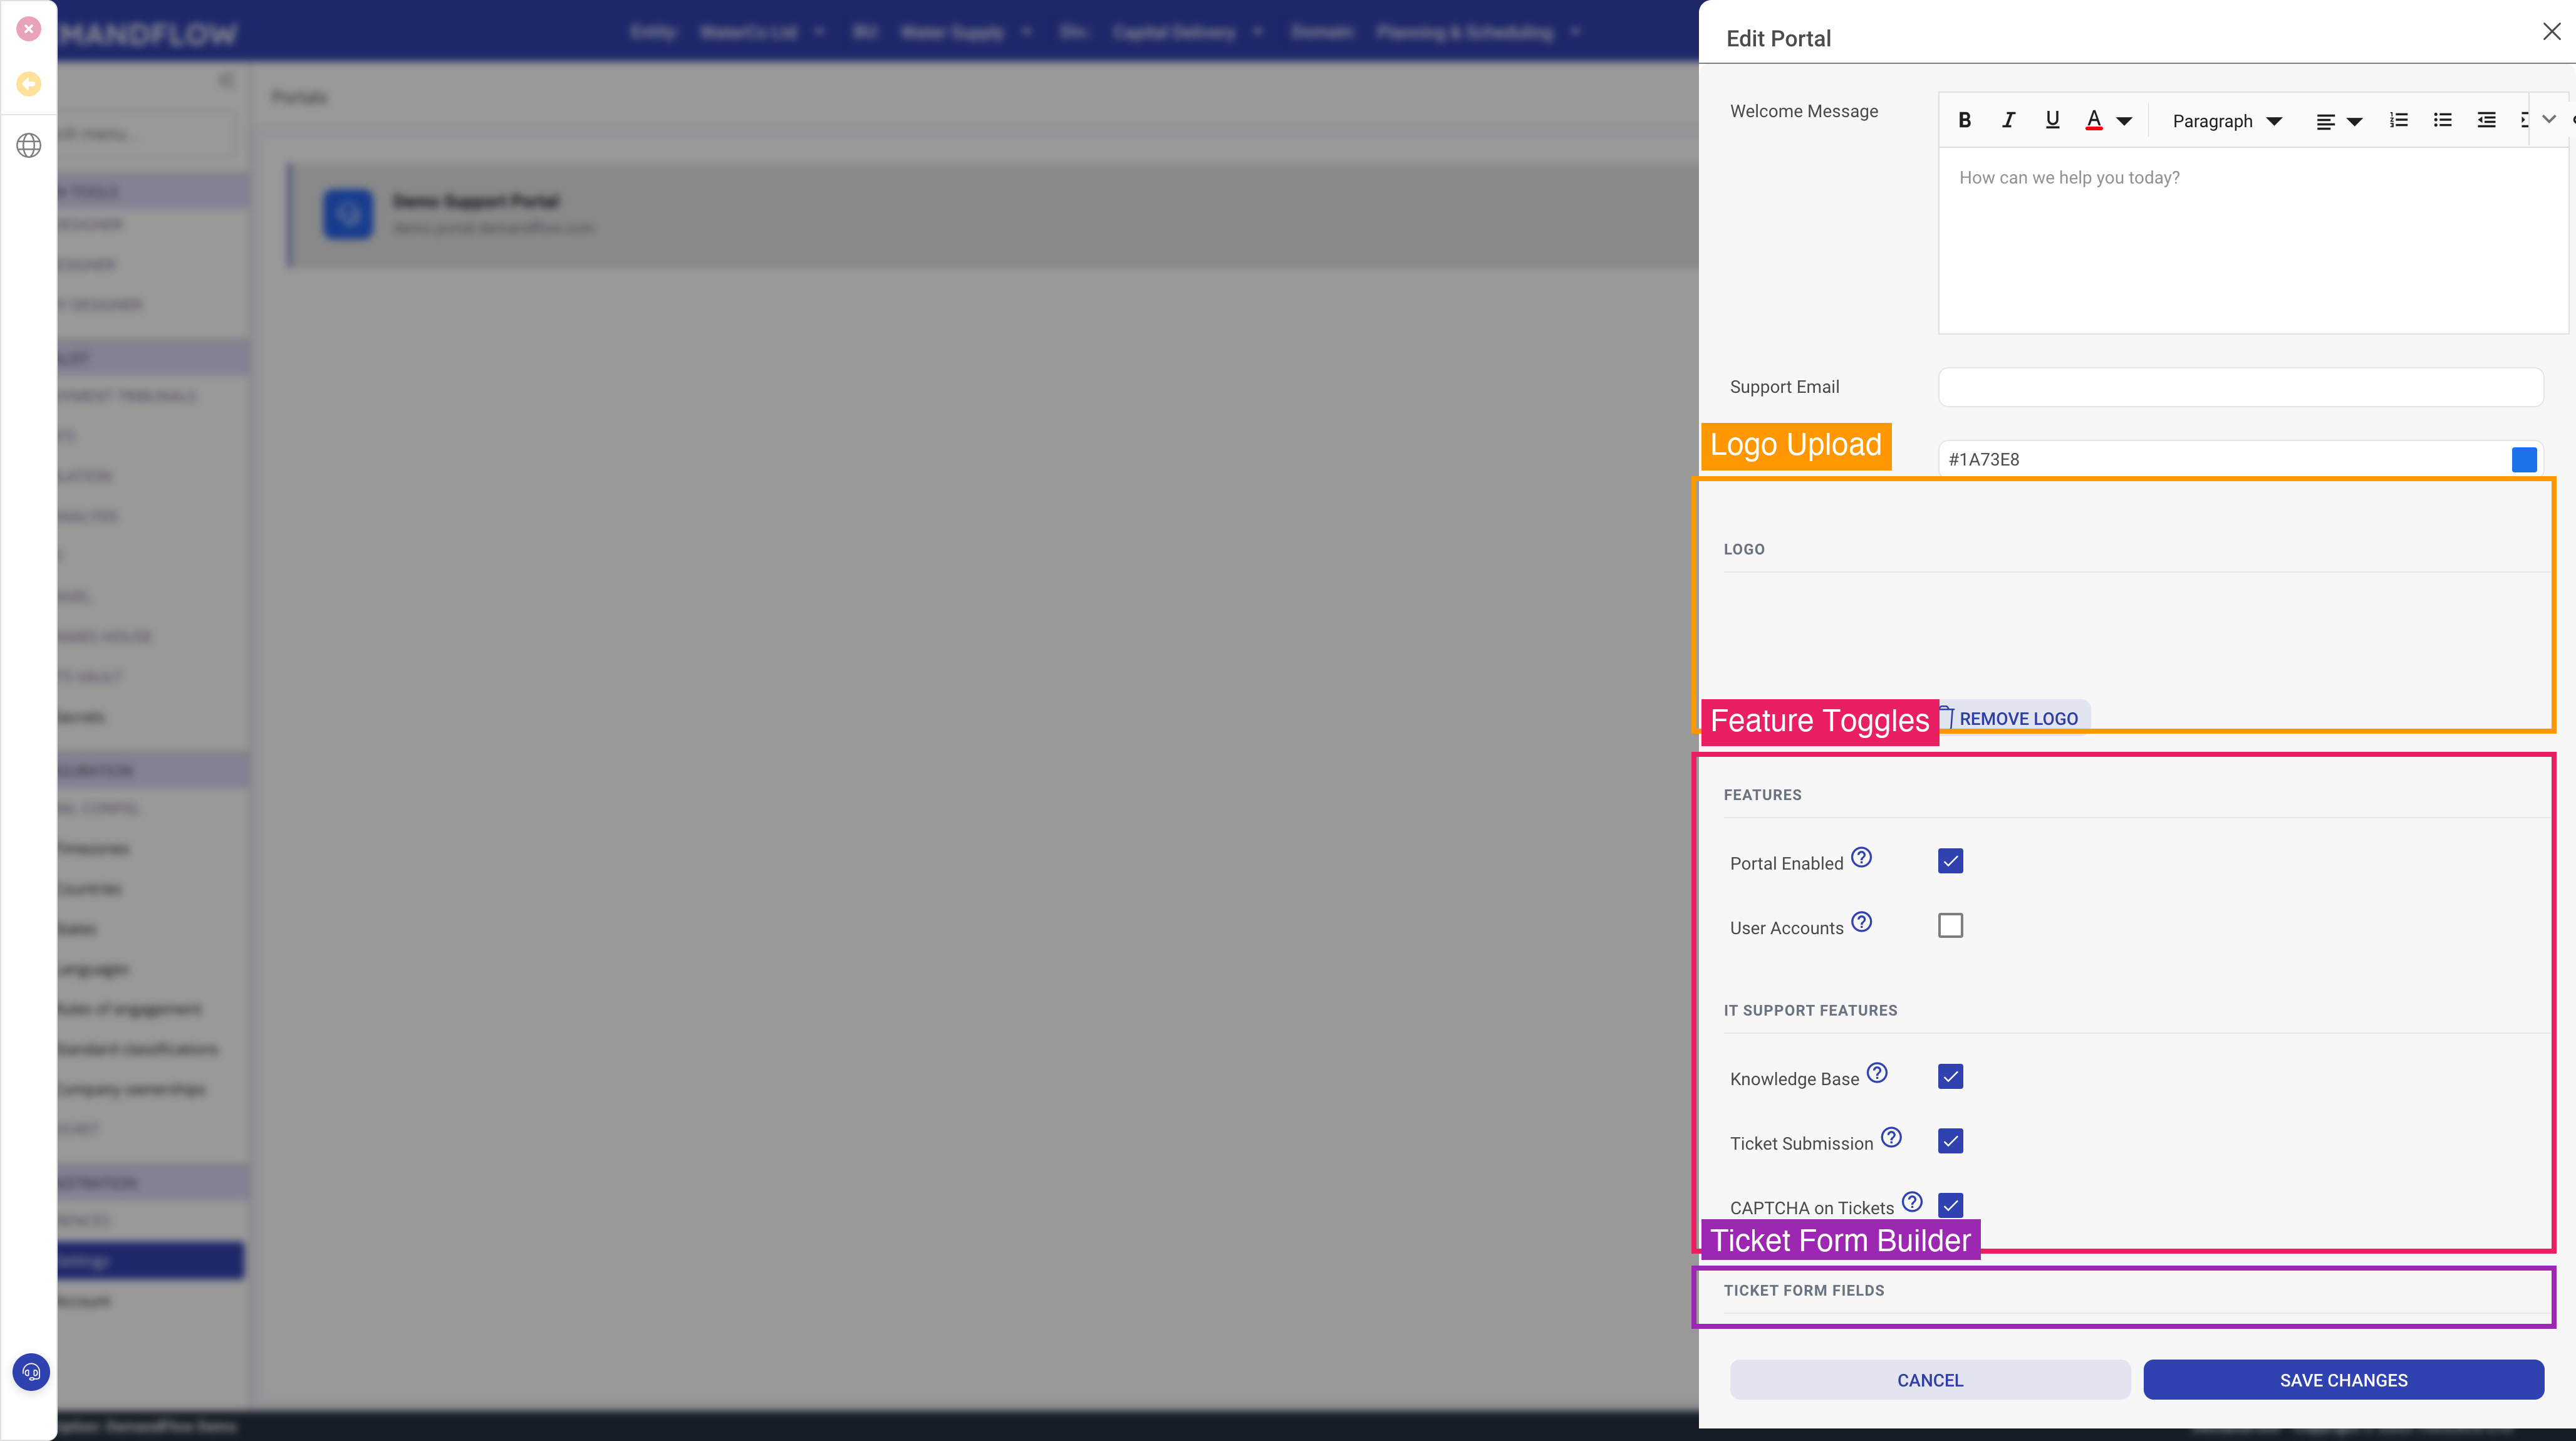
Accessing Feature Settings
Open your portal in the portal settings area. The feature toggles are found in the Features section of the portal editor.
Core Settings
Portal Enabled
This is the master switch for your portal. When enabled, the portal is live and accessible at its subdomain URL. When disabled, visitors to the URL will see a message indicating the portal is not available.
Keep this disabled while you are setting up and configuring the portal. Enable it only when you are ready for users to access it.
User Accounts
When enabled, portal visitors can register for an account using their email address. Registered users can:
- Log in and track their submitted tickets
- Receive email notifications about ticket updates
- Have their name and email pre-filled on forms
When disabled, the portal operates in anonymous mode — users can browse the knowledge base and submit tickets without creating an account.
IT Support Features
These features are available when the portal type is set to IT Support:
Knowledge Base
When enabled, the portal displays your published knowledge base articles organised by category. Users can:
- Browse articles by category
- Search across all articles
- Rate articles as helpful or not helpful
- View article ratings and popularity
For the knowledge base to show content, you need to have published articles (status set to "Published") in active categories. See Setting Up Your Knowledge Base for details.
Ticket Submission
When enabled, the portal includes a Submit a Ticket button that opens a customisable form. Users fill in the required information and submit it, creating a support ticket record in DemandFlow that your team can manage.
The fields shown on the ticket form are fully customisable. See Customising the Ticket Form for details.
CAPTCHA
When enabled, the ticket submission form includes a CAPTCHA verification step. This helps prevent automated spam submissions. It is recommended to enable CAPTCHA if your portal is publicly accessible and does not require user accounts.
Contractor Features
These features are available when the portal type is set to Contractor:
Timesheets
When enabled, contractors can submit timesheets through the portal.
Expenses
When enabled, contractors can submit expense claims with supporting documentation.
Invoices
When enabled, contractors can submit invoices for processing.
Feature Combinations
You can enable any combination of features that suits your needs:
| Scenario | Recommended Features |
|---|---|
| Self-service help desk | Knowledge Base + Ticket Submission + User Accounts |
| Information-only portal | Knowledge Base only (no tickets) |
| Ticket-only portal | Ticket Submission + CAPTCHA (no KB) |
| Full support portal | All IT Support features enabled |
| Contractor submissions | Timesheets + Expenses + Invoices + User Accounts |
Going Live
When you are satisfied with your portal's branding, content, and feature settings:
- Review your portal by visiting the URL in a browser
- Check that the knowledge base articles are showing correctly
- Test the ticket submission form (submit a test ticket and verify it appears in DemandFlow)
- Toggle the Portal Enabled setting to on
- Share the portal URL with your users